

Allow me to introduce Angela Wolf to you. She is a fashion designer and sewing expert, anchor of the PBS series It’s Sew Easy, host of a weekly facebook live show Behind the Scenes, and founder of the Angela Wolf Pattern Collection. She teaches online classes on Craftsy, Patternreview, and www.AngelaWolf.com. Author of How to Start a Home-based Fashion Design Business, Angela is also a blogger, vlogger, spokesperson, a brand ambassador. She is the author of today’s post. Read on for step-by-step instructions on the Brother Luminaire. ~ Eileen
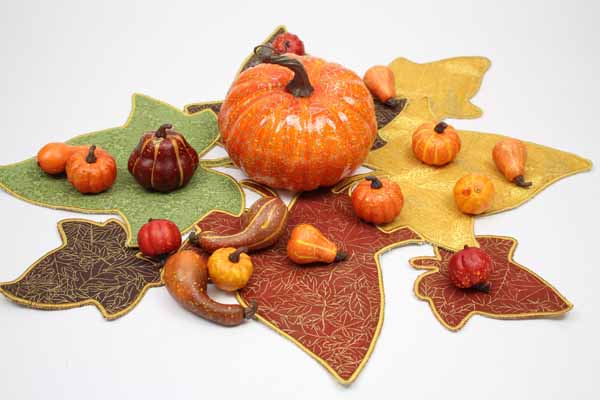
Whether you are hosting a feast for Thanksgiving dinner or looking for a simple table decoration for the fall season, this leaf applique center piece is ideal. I am starting with a small circular center piece, but keep in mind you can add as many leaves as you need to cover your table or counter top! Let’s get started …
Supplies

- cotton fabric cut 11” by 11” for each leaf
- Sticky-back tearaway stabilizer
- ½ yard cotton fabric backing
- Applique scissors
- Embroidery Thread
- Choose a leaf embroidery design. I am using a built-in leaf design from My Design Center in the Brother Luminaire; another idea would be to sketch a leaf and scan in the design.

- Click on SIZE and expand the leaf to over 200mm

Optional Design Tip: Choose a solid color cotton for the leaves and add stippling. I will leave instruction on when to embroider the stippling.

- Convert the design into an embroidery design and change the leaf outline and stem to a running stitch. SAVE the design.

- In the EMBROIDERY screen, DUPLICATE the leaf. MOVE one design to the top half and the other to the bottom half of the screen. ROTATE the designs so they overlap.

- Add an APPLIQUE outline to each leaf; change the distance to 5.0mm.


EMBROIDERY
- Hoop the Sticky Back Tearaway Stabilizer with the paper side up, score the paper and insert the hoop into the embroidery machine.
- Open the list of embroidery steps: skip ahead to the first set of applique stitches and stitch the placement line.


- Remove the hoop. On the backside of the hoop: Center the backing fabric (with right side facing out) over the leaf outline and tape the fabric in place. On the topside of the hoop: center one of the colored fabrics over the leaf design.

- Stitch the next step in the applique. Remove the hoop. Trim off the excess fabric on the front and back fabrics.


- Insert the hoop. Stitch the remaining applique stitches. (Optional: stitch the stippling). The first leaf is finished! Skip ahead to the next set of the applique stitches and stitch the second leaf placement outline.

- Repeat steps 7 – 10.


- Remove the hoop and tearaway the embroidery stabilizer.

ATTACHING THE LEAVES
- Hoop a piece of sticky-back tearaway stabilizer with the paper side up and score the paper. Place the first set of leave along the left edge of the hoop as shown (the leaves should stick to the stabilizer). Use the SCAN feature, then MOVE the embroidery design or finished leaves until all the leaves are overlapping.

- Use the StitchVison feature to project the embroidery design onto the hoop. Double check the overlapping on the first set of finished leaves. Continue to move the finished leaves or embroidery design as needed.

- Follow steps 7 – 12.


TIP: Add Fray Check along the edges to prevent fraying, which is exactly what I will be doing when my center piece is complete!
MINI LEAVES
- Follow the same steps to design and embroidery smaller individual leaves, just make sure the leaf embroidery designs are not overlapping.
CUTTING TIP: Transfer the leaf applique .PES embroidery file to the Brother ScanNCut. Let the ScanNcut do the cutting.


There are so many possibilities with this leaf pattern! Consider using a solid colored fabric with metallic embroidery thread for the stippling or try a lace for the fabric. I am planning on embroidering up both for the holiday season. Be sure to share photo’s of your new table decorations, I always love seeing what you are working on. #angelawolf #brothersews
Cheers,
Angela
[line]
Pingback: Who Wants To Be A Millionaire – Looney & Chadwell Title Services LLC on October 1, 2018
Pingback: Play-Play Online Casino Games And Win Real Money – GoAcademica on October 1, 2018
Pingback: 1888LUVPARX – My Blog on October 1, 2018
13 COMMENTS
SANDRA CUNNINGHAM
8 years agoThat was a great tutorial! I love the idea of falling leaves on a Holiday leaves. Hmmmm? Snowflakes next?
SANDRA CUNNINGHAM
8 years agoI meant Holiday table!
Karen
8 years agoWow! I’d sure love to be able to own one of the newest embroidery machines like this! They are so fantastic and do so much!! What a great project!
Sara Redner
8 years agoAngela, I love this. The same technique would also be cute with Christmas ornament balls or bells (or snowflakes as Sandra said), etc. I have an Innov-is so would have to do them one at a time but after seeing your idea, I think I could make it work.
Angela Wolf
8 years agothanks so much, my table is ready – which never happens in time for fall 🙂
Angela Wolf
8 years agothanks Karen 🙂 This turned out even cuter than I planned!
Angela Wolf
8 years agoHi Sara,
Oh yes, you can use that machine – and what a great idea with ornament balls! I was just scanning designs and found a tree, but the ornaments will be SO much more creative!! thanks ♥
JD
8 years agoI love this table decoration. I think I would use a pinecone or holly or poinsettia or hmmmm. Thanks so much for your creativity and sharing it.
Thanksgiving Wishes
8 years agoEnjoyed reading the article above , really explains everything in detail,the article is very interesting and effective.Thank you and good luck for the upcoming articles.
Gaynelle Gonzales
7 years agoI was looking for a person who’d be able to clearly browse me about this issue and was fortunate enough to find you.
Thank you a lot for the detailed reason, you
drew attention to a very common matter! Though I share your
opinion for the most part, I think that a few things are worth having a more comprehensive appearance
to comprehend what’s going on.