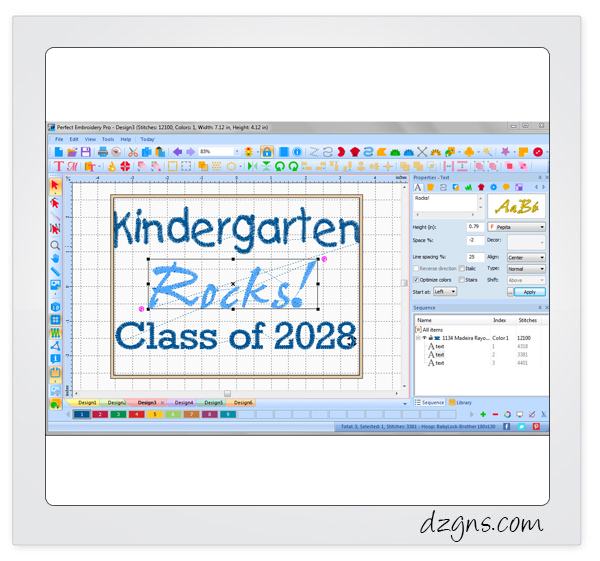
In today’s lesson, I’ll demonstrate how to create the special requested Kindergarten Rocks embroidery layout. If you missed part 1 of the series from Monday, you can read it here: Part 1 of Kindergarten Rocks
[line]
Open Perfect Embroidery Pro (PEP) software and select the “T” for text tool in the upper left hand of screen. Type the word “Kindergarten” and select the “Kids” font from the font drop down menu. Click “Apply”.

Click the “T” for text again and type the word “Rocks!” in the text box. Select the “Pepita” font from the menu and click Apply. Move the word down to fit underneath Kindergarten and size accordingly.
Click the “T” again for the text tool and type the words “Class of 2028” in the text box. Locate the Geometric font from the font choices and click Apply. Position the text centered underneath “Rocks”.

Go to the drop down menu at the top left upper screen and click “File” Click2Stitch from the drop down choices. Click2Stitch will offer an option box in the center on the screen where you can select the fabric. Under type of fabric select “knit light” (onsie, t-shirt).

Click “Next” and “Finish”. The Click2Stitch automatically adjusts the density for the fabric selected and recalculates the stitches. It also recommends stabilizer and pre-washing if needed. You have the option to print the steps if desired.

Select the 5″ x 7″ hoop.

For the step by step directions on proper design placement and hooping techniques for this project refer to the Multi-needle Monday Blog titled: Kindergarten Rocks!


6 COMMENTS
boom beach hack tool ios,boom beach gemmes gratuites,boom beach hack apk 22.70,download boom beach hack tool,boom beach hack apk 21.167,boom beach triche ipad,boom beach android hack,boom beach hack tool android,boom beach hack tool apk,boom beach android
10 years agoJe génère des gemmes tout nos jours também juste algun peu vehicle j’ai crainte que
ce soit repérable si about en fait trop d’un vicissitude.
village clash of clans
9 years agoThank you. I have been previously trying to find this data village clash of clans. Good data I’ll check back for virtually every information and facts around the 3 Working day Diet.
boom beach hack ifile,telecharger boom beach hack tool,boom beach triche app gratuit,boom beach hack tool gratuit,download boom beach hack tool v3.19,boom beach hack android gratuit,boom beach diamants illimités gratuits,boom beach android hack gratuit
9 years agoCandy Grind Saga hack into est los angeles solution numéro un put se débarrasser de
le présent frustration.
boom beach hack tool apk,telecharger boom beach hack apk,download boom beach hack tool v3.19,Telecharger Boom Beach Hack,boom beach hack iphone,boom beach hack ios,boom beach triche apk,boom beach hack tool android,download boom beach hack tool,boom beach
9 years agoNous-mêmes avons vite trouver leur méthode put obtenir
kklk diamants gratuits dans Increase Beach, ainsi que nous allons vous dévoiler l’astuce.
boom beach hack ifile,telecharger boom beach hack tool,boom beach triche app gratuit,boom beach hack tool gratuit,download boom beach hack tool v3.19,boom beach hack android gratuit,boom beach diamants illimités gratuits,boom beach android hack gratuit
9 years agoIf you want to find each individual combat and win over your folks along with Boom
Beachfront, quit wasting time and charge!
gemme illimite clash of clan
8 years agoAt this moment I am going to do my breakfast, when having my breakfast coming again to read further news.