Today’s blog is inspired by a reader’s recent question. We hope you enjoy and be sure to keep those questions coming!
——————————-
On July 21, 2014, reader Beth Price left a comment asking how to center a t-shirt with Multi-Needle Monster and PAL. Here’s how I do it.
First, prepare your hoop. Multi-Needle Monster comes with four adhesive centering guides. Apply them to the top of the metal frame. 
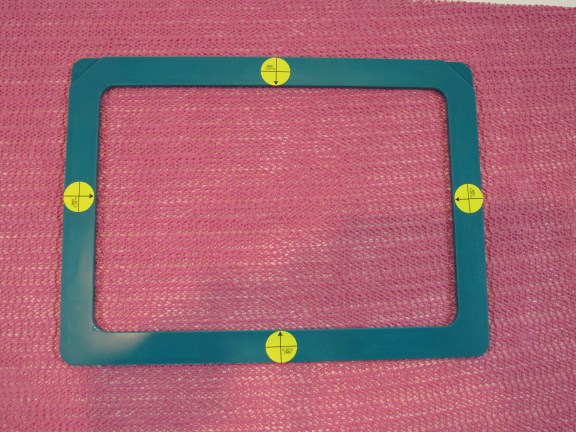
Mark the centers of the magnetic frame on the magnet side with a permanent marker. For illustration purposes here, I’ve place four Target Stickers on the marks so you can see them clearly. Set the hoop aside. 
Stabilize the knit shirt with fusible polymesh cut-away stabilizer. I use the Embroiderer’s Helper for left chest placement because it provides flawless placement. Fold the t-shirt in half, matching the shoulder seams. Place the folded t-shirt on a flat surface and align the Embroiderer’s Helper’s straight edge with the fold. The notch at the top left goes right under the neckline ribbing. If there was a button on the shirt, the notch will land right under it. Slide a target sticker into the notch corresponding with the size of the t-shirt. My shirt is large so I align the target sticker with the notch marked Large. Remove the Embroiderer’s Helper. 
Place the shirt under PAL and turn on the beam centering the target sticker. Alignment now is not crucial; you’ll fine tune that in a few moments. 
Slide Multi-Needle Monster’s magnetic frame, magnets up, inside the shirt. Open the t-shirt to view the frame. Align the frame with the beam. 
Smooth the shirt front over the frame aligning the target sticker with the beam. 
Position the metal frame on one long edge of the magnetic frame holding it perpendicular to the magnetic frame. Check the alignment. The beam should hit the center mark of the metal frame.  Carefully release the metal frame onto the magnetic frame. Smooth the t-shirt by gently tugging on the fabric beyond the edges of the hoop. Since the t-shirt is stabilized with a fusible cut-away the fiber will not distort with the frame. Remember, it’s a flat hoop so it’s perfectly acceptable to pull on the fabric – within reason! You wouldn’t want to use brute strength, just normal handling.
Attach the hoop to the machine, hem first. 
Inserting the free arm into the hem (instead of through the neck) insures that hoop can move freely during the embroidery process. 
You gotta love these multi-needle machines – they make embroidering on blanks so easy!


4 COMMENTS
Elizabeth Dauzart
11 years agoI would like a tutorial on how to find the center of the
snap hoop monster after it is put on the 6 needle machine.
I know you can adjust the design on the computer screen, but I’m
never sure where it will end up in the hoop. Help?
Mai-Britt Trasborg
11 years agoI would llike to know too
Ashton Pae
11 years agoIve never read something like this just before. So nice to locate somebody with some original thoughts on this topic, really thank you for starting this up. this web site is some thing that’s needed on the internet, a person having a small originality. valuable job for bringing something new towards the world-wide-web!
Opu
10 years agoLots of questions have been rolling in about the adorable Santa’s Helper elves on the cover of our November/December issue.
http://www.tshirtmanufacturerbd.com/