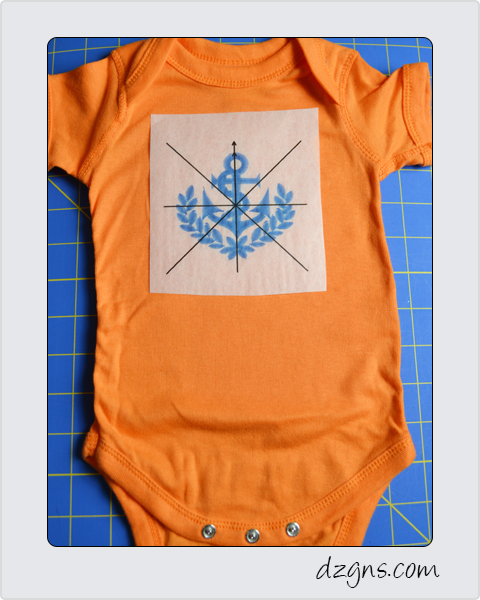
The needle camera and positioning stickers are one of the most efficient tools included in many Brother and Baby Lock embroidery machines. The higher end sewing/embroidery and multi-needle embroidery machines contain this fascinating technology. The live needle camera actually displays exactly what is placed under the needle such as: hooped fabric or even your hand (not while in operation please!)
The positioning stickers are included with the machine when purchased and are to be used in combination with the live camera. Baby Lock refers to the stickers as “positioning stickers” and Brother refers to them as “Snowman stickers”.To properly place an embroidery design, print a template on tracing paper or velum from embroidery software. Place the template on the garment. Locate the exact location for the embroidery design to be stitched. Slide the positioning sticker under the template cross hair mark and remove the template.


Hoop your item in the correct size hoop to fit your garment; in this case a 4×4 hoop is the correct hoop to use for a baby onsie. Select the embroidery design and always take notice of the actual size on the screen; the size 3.09×3.23inches. The design will fit in the hoop.
 Touch the positioning sticker or Snowman icon on the screen.
 The screen will most likely tell you the “the design extends out the pattern area”. Your first thought is to re-hoop the onsie in a larger hoop. But go back to the edit screen and decrease the size a bit.


 Now touch the positioning icon once more and it will fit as needed. You might have to re-adjust the size a few times at the screen, but it is easier than re-hooping a baby onsie. The reason for this message appears because the machine wants the ability to completely rotate the embroidery design within the hoop. If the positioning sticker is not completely centered in the hoop (especially if using a small hoop) it will want you to re-hoop the item.
Join me in my Craftsy class “How to Start a Machine Embroidery Business”. Click the link to save with this coupon.
https://www.craftsy.com/ext/MarieZinno_4963_H


9 COMMENTS
Joanne Banko
9 years agoAhhh yes, that little Snowman needs room to roll around! Thanks for a great explanation of his little known personality trait Marie. I’m sure many machine operators have wondered why that sometimes annoying message will appear. It all makes sense when you know that this technique requires a little extra “bump room” around the Snowman Marker. If you can’t upsize your hoop then you need to downsize the design. You’ve given great advice with clear photos showing what to do in this situation.
Candy Mittag
9 years agoThanks for the explanation! Does the head of the snowman sticker always go north/south? The manual doesn’the explain that clearly.
Joanne Banko
9 years agoHi Candy, I have a quick answer for you – the Snowman Head always represents the top (North) end of the design. You can rotate the Snowman marker and then after the scan the machine rotates the design automatically to match the orientation of the Snowman. He can even go upside down if that is what you desire!
Carolyn
9 years agoAs usual you gave a quick and clear explanation. When I first got my Babylock Enterprise I wasn’t understanding the Snowman and his needing room to rotate. I said some rather mean things to my machine when I knew the design fit the hoop. The manual wasn’t clear, but I have a wonderful dealer from whom I purchased. Much like you, she feels there are no questions too silly to ask.
Jennie
8 years agoThank you for a wonderful explanation :).
Joanne Banko
8 years agoMarie’s tutorial is really so illustrative. The manuals seem to be better at telling you what “to do” rather than what not to do! Besides, some things just get lost in the translation and those sorry that won’t work screens seldom explain the “why” behind the “what” the way Marie’s photos and descriptions do
Carolyn
8 years agoThanks for this excellent information. The pattern too large error message has been a great source of frustration. I have a working understanding. Thank you.
Bruce
8 years agoGreat post! Very helpful information. Thanks for sharing.
Bruce, https://www.printavo.com
Colleen
6 years agoI could not find explanations with my DM2 and the snowman. I have been in search of others talking about the snowman, etc. That error screen has always popped up and your explanation is great. Does anyone know of site that has fellow sewers talking about their DM2?