

Hat embroidery presents two challenges for the home embroiderer. First, hat embroidery usually entails small lettering. Second, keeping a hat in a hoop on single-needle, flat bed machine is tricky. We’ve got you covered on both bases! Inspirations’ Word Art in Stitches is the perfect software program to create a quick hat embellishment. In Word Art in Stitches, click on the Bubble Text icon and select the following items in the preview window:
- Shape: Select the state of your choice.
- Change the default size to 75 mm width and 71 mm height.
- Border: Steil
- Words: Remove My Text
- Click Apply
Select the Micro Text tool and type Home in the Properties Box. Select the Arial Small font. Click Apply. Move Home into the state.
Click on the Text Designs tool, scroll down and select So99686. Click OK.
Right click on So99686 and select Ungroup from the drop down menu.
In the Color Sequence window, click on the eyeball next to the star colors to hide them.
Select the remaining portions of So99686 and delete them.
Click on the eyeballs again in the Color Sequence window to reveal the star. Move the star next to Home. Save the design and print a template to audition it on the hat. Tape the template to the hat.
The easiest way to hold a hat in a single-needle flatbed hoop is to use adhesive tear-away and our newest product, Hoop Clip. Here’s how to do it: Place adhesive tear-away stabilizer on the back of the Snap Hoop Monster’s metal frame. Snap the Hoop Clip onto the bottom frame. Hoop Clip is magnetic and attaches easily and firmly to the metal frame.
Open the clip and slide the brim into the opening. Finger press the cap onto the sticky stabilizer.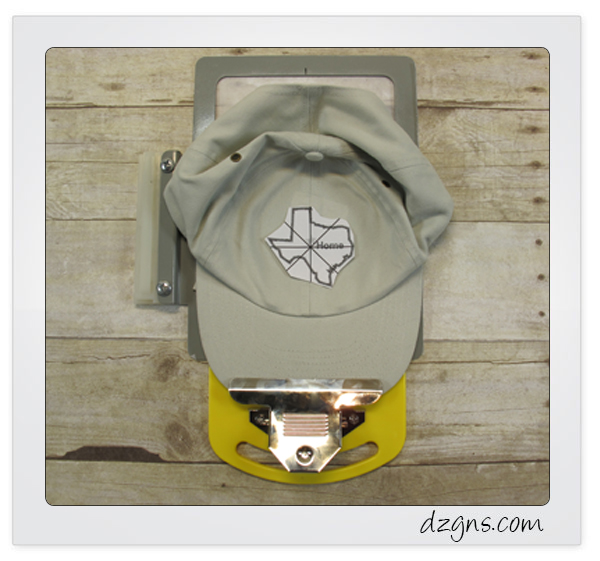
Attach the hoop to the machine and stitch the design.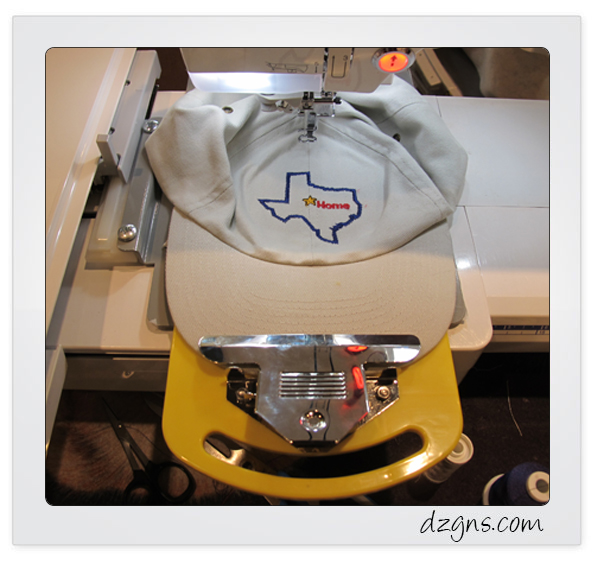
Sweet! A hat on a flatbed single-needle machine!
11 COMMENTS
Glenda
10 years agoWill this hoop clip work on the husqvarna Vikng 5×7 metal hoop?
Francine Mollica
10 years agoI have the 5×7 snap hoop for the Bernina 730e. Will the clip work with this?
judy
10 years agoI have a Babylock Elegante. Will this work with my machine? Also, where do you get these?
Dori
10 years agoHere is where to find this really cool tool!!
http://www.shop.dzgns.com/collections/designs-in-machine-embroidery-snap-hoop-hooping-systems/products/magnetic-hoop-clip
If you use a Snap Hoop Monster metal frame, this will work.
Dori
10 years agoHi,
Here is where to find/read about this really cool tool!!
http://www.shop.dzgns.com/collections/designs-in-machine-embroidery-snap-hoop-hooping-systems/products/magnetic-hoop-clip
If you use a Snap Hoop Monster metal frame, this will work.
Dori
10 years agoHi,
Here is where to find/read about this really cool tool!!
http://www.shop.dzgns.com/collections/designs-in-machine-embroidery-snap-hoop-hooping-systems/products/magnetic-hoop-clip
If you use a Snap Hoop Monster metal frame, this will work.
Francine mollica
10 years agoHi. I don’t have the monster. Just the regular snap hoop that I bought from you some time ago. Will it still work?
Thanks
Kathy Petersen
10 years agoI used this hoop clip for the first time this week. I loved how easy it was to use. Thank you for another great product!
Annabell Wehrli
10 years agowow.. that looks amazing.
googleplay
10 years agoThanks a lot
Bruce
9 years agoIt looks cool! Thanks for sharing.
Bruce, https://www.printavo.com