

Yesterday, I was prepping t-shirts from the Simple to Chic T-shirt Remakes collection that Nancy Zieman and I recently created. I ruined one of them. I stepped away from the machine for a second (that’s when danger sprints into the sewing room) and when I returned, the needle was pounding through several layers of t-shirt – of which only one was supposed to be stitched. URGH! I exhaled and carefully removed the stitches to release the excess fabric. It worked out okay – the t-shirt will be used for teaching purposes only so I can hide the damage. I moved on to other tasks.
Then last night, I was sleeping and dreaming about work (that’s a mix between a dream and a nightmare). The dream/nightmare involved t-shirts. I was reliving the day’s activities (see how boring I am – I dream about this stuff!) and then I woke with a start. Use Press’n Seal to control the bulk around the sewing field. Yes – Press’n Seal, sealable plastic wrap, that you find in your local grocery store. Brilliant!
I couldn’t wait to get to the office and try it out. And lo and behold – it’s perfect! I cut a 4” strip and then cut that in half for two 4” x 6” strips. I rolled the t-shirt up around the sewing field and stuck a strip of Press’n Seal on each side of the sewing field.
Oh My Gosh – brilliant. Now all those folds and rolls are controlled out of harm’s way. That’s what I call taming a tee!
Here’s your assignment this week:
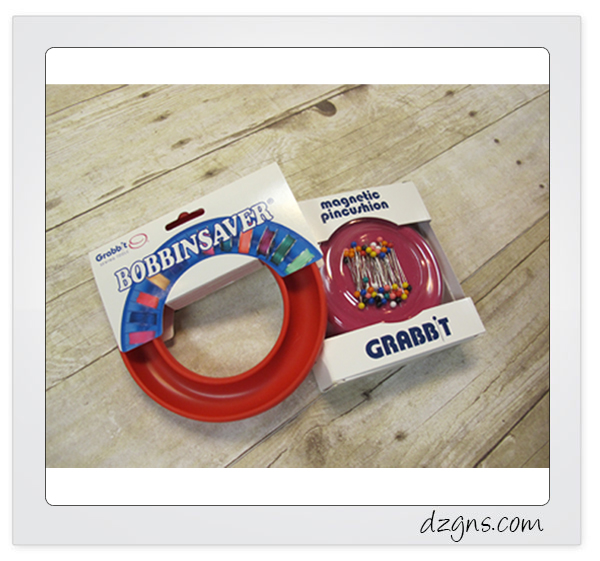
Have you had a ‘lightbulb’ go off recently? Share your Aha moment with us and you could win a sewing room twin set! What’s a ‘sewing room twin set?’ Gifts from our friends at Euro-Notions – Grabbit magnetic pincushion and Bobbinsaver.
The winners of the last assignment answered the following question:
Now it’s your turn! Tell us about a recent accomplishment that you’re especially proud of! This is your chance to share and inspire other readers. It can be related to machine embroidery, sewing or any other skill you’ve honed! 4 random comments will be selected and each person will win a $25 gift certificate to go on a fun shopping spree at Zippy DesignZ.
The winners are:
Doreen Linehan: “I made a tuffet. Used a whole bunch of things I had never used before. Long Upholstery needles, metal button, 15 degree ruler. Came out great.”
Linda Lynch: “I was fearful of using my embroidery machine and am making small projects i.e. Small art quilt, kitchen towels and graduated to a beautiful large tote for carrying supplies to classes.”
Judie: “Gee, where do I start!!~ Yes, my Evolution is sitting in the corner,…. I need to get a grip on that and actually use it. I have designs and handkerchiefs ready to try a cutwork corner…. someday AND that continuous border will be on my next set of pillowcases. Yes, really love this key fob design and am proficient at In-the-Hoop so I’ll be giving it a try. I read directions at EVERY step. Only takes one or two boo boos to learn that.”
Deanna: “I recently finished a baby blanket for my niece. Their theme is camouflage and deer. So I embroidered 5 blocks with different bucks, found coordinating deer fabric and put it all together and gave it to them at baby shower. They loved it!”
48 COMMENTS
beth daniels
10 years agoI use the tape that goes around red leaf lettuce to keep the bunch together, wash it then use to wrap around my rolls of stabilizers. You can write on them with a felt tip pen what stabilizer it is.
Francine
10 years agoI have my aha moments in my sleep. When I cant figure something out I just put it aside. Than I wake up in the middle of the night with the answer. Its been that way for 40 years! Welcome to the club!
Belinda Germain
10 years agoI am the type of person who reads everything I can get my hands on before starting a project, running a machine or trying a new method of doing something. My Babylock six needle came with an excellent manual except for the cover is just thin paper like the pages. So how will I keep it nice looking when I know I will read it cover to cover several times? I finally decided to purchase page protectors, used my rotary cutter and cut the pages from the binding and placed them in a three ring binder. Easy to look at, easy to leave open where I want it and the pages stay clean and crisp!
Beth R
10 years agoI have many thread cones that tend to loose their labels, and they have no marking on the cone as to the thread color or number. After losing a couple of labels and guessing at the color number, I started writing the color number on the edge of the spool using a very fine permanent pen – that way, if (more likely, when) the manufacturer’s label falls off, I can still tell the actual color number of the thread.
Gail Beam
10 years agoI used springs from a ballpoint pen to stick out from the embroidered head of Frankenstein. It added a 3 effect along with the tiny plastic spider I hung from a string to dangle next to him.
Jan Thousand
10 years agoI have a table which I specifically use for hooping. I had some left over non skid rubber you use under rugs I taped the corners to the table and it works wonderfully to keep the hoops from not sliding and staying put.
Lynda
10 years agoI like to take my instruction manuals to the office supply store and have them bound with plastic binding so they stay open where I want them to.
Chris Lyon
10 years agoI was trying to find the length of a cuff opening on an oddly shaped pattern. I realized that it was simply the base of an isosceles triangle. a squared + b squared = c squared. Light bulb time.
Bonnie Gray
10 years agoI was using one of your designs for lace additions to t-shirts but unfortunately did not read the directions about how to connect the pieces together. I had cut the threads where the pieces should be joined. So I put it aside for a few days. Looked at it again and read the directions but thought I would have to stitch them together on regular machine. But I had a dream last night and figured out how to re-stitch the connecting threads on stabilizer and then stitch the sections together. plan to do that tomorrow!!!
Pam
10 years agoWhen I get a project I read the instructions over and over until I get that aha moment. I am such a chicken. I can’t believe you thought about press and seal. Ingenious.
Robyn
10 years agoI use press and seal for quilting. Draw the design on it, tape it down and free motion right over your drawn design. Very easy to remove which is an added bonus
Karen Poole
10 years agoI recently purchased something to help with the fabric not falling in onto the sewing area, I don’t remember the name but got it from the Designs in Machine Embroidery store, it is red pieces of plastic that tuck under the edge of the hoop and tame the fabric. They work great!! One thing I’ve started to do when it comes to my embroidery stabalizer rolls, when I take the wrapping off, first I tape the label to a piece of paper and tuck it inside the roll. Next, I take an empty cardboard roll from paper towels and cut it down the middle. Then I write the type of stabalizer on the roll and wrap it around the stabalizer roll. It keeps my stabalizer from unrolling plus I can easily see what type of stabalizer it is, and the best thing is it’s free!
Karen
10 years agoHow cute! Nice thought!
Kelly Sas
10 years agoI am new to machine embroidery so all these Ahh-ha moments are so helpful! I wanted to keep my spools of thread in order when using them for a design stitch out but not next to machine where they could get knocked over. I placethem in order of use in an open egg carton. That way they stay put and if a color is repeated, I skip a “egg” and replace it in there when done using it the first time.
L
10 years agoI use Press’n Seal for topper in all but intricate (lacy-like) designs. It is permanent and the bonus is it sticks to the embroidery. Easy to remove except with designs with lots of really tiny open areas. Otherwise perfect! Really solved the problem of the topper dissolving and fabric popping through. Superior in most cases and really inexpensive!
Melanie
10 years agoThere is also a website that sells an item called quilt on a roll. The website is quiltingmadeeasy.com. I ordered it to quilt the border of a king sized t shirt quilt that was a graduation gift for my granddaughter. It worked like a dream and was an economical, accurate alternative to any other method I have used.
Cathy
10 years agoI’ve been working on a wall hanging panel. I like to do some thread snipping/clean up as i go, but my little pile kept getting stuck on my sleeve, pieces falling on the floor etc. So i got up to see what i had close buy to collect them..spotted the lint roller..works like a charm..roll it over the fabric & table..collected them all!
Sandi Cunningham
10 years agoThat’s brilliant. I did not know you could do that! Thank you
Sandi Cunningham
10 years agoRecently, I was teaching my cousin how to use my 4×4 embroidery machine. My AHA moment came after twice trying to embroidery a simple outline heart in pink. The bobbin thread kept showing up on the front. All of a sudden “AHA” I replaced the needle and bobbin and stitched out a perfect pink C in the middle of the heart. It was a great lesson for her, although unintended, and for myself. It’s not always the machine, the tension–sometimes it is the supplies.
Rita
10 years agoCollecting ideas for a new sewing room. Love the idea of a separate table for hooping.
Valerie
10 years agoMy most recent ah ha was to use paper towel tubes — Cut a piece of tube about 1-2″ . Slice up one side. Put around rolled anything! works great for rolls of fabric, which I can then stack in cubbies.
Pam McD
10 years agoI use those clippies for binding help when sewing. I put the bottom hoop on the machine, then lay the quilt part I am embroidering over the top. Then clip the edges of the fabric until it is tight and straight. I have to watch the machine though, as it will go to the edge and hit them at times. It isn’t something you can walk away from. But it is how I can machine quilt some of my stuff.
eileenroche
10 years ago AUTHORKaren, the ‘red pieces of plastic’ that you are referring to are Hoop Guards for standard hoops. And you’re right, they are great for holing things out of the hoop. But on this project, the t-shirt was not hooped – it was laying on hooped sticky stabilizer so the Hoop Guards wouldn’t work in this application. Glad to hear they have worked for you on your embroidery projects!
Cheryl C
10 years agoHad trouble keeping my stabilizers for embroidery in an orderly fashion…I got a multi-pants hanger and put rolls of stabilizer on it with labels as to which kind of stabilizer is on which branch of hangar..it keeps it all in one place and I don’t have to guess as to what kind it is.
Jo Mimms
10 years agoSpeaking of kitchen products, for those who may not have discovered this yet, in a pinch you can use the nonstick aluminum foil if you can’t find your Teflon sheets! Would not recommend this as your day-to-day notion, but if you’re like me with too many projects going at once, my usual notions either get buried or ‘reassigned’ – so this helped out since it was just upstairs in the kitchen drawer.
Mary Lou Nelson
10 years agoI use empty spools as a holding place on my thread stand when I machine embroider, if I have to use a certain color more than once in a design. That way I don’t forget and pick up the next color by accident.
Leslie Coduti
10 years agoI like to use double stick Wonder tape to match panels when making a quilt back from a busy fabric. You first fold one piece 1/2 – 1 inch wide, and press it then you start wonder taping that edge and matching it up to the pattern on the other panel. When done, lift carefully and sew right on the crease. You can remove 95-100 % of it when you open the seam, the rest dissolves away.
Sharon R
10 years agoI also get so many of my aha! moments while sleeping, in fact almost anything that bothers me will be rehashed in my dreams until I get a good outcome. For the last few months, that has been understanding algebra concepts. Maybe tonight I will have one of those moments in regards to filing for my business license and determining what my IRS use code or my NAICS code is for my husband’s and my embroidery and silk screen business.
Cindy Carson
10 years agoMy aha moments are much less helpful than those already posted. I keep myself from losing patterns, instructions, and projects I want to do by putting them in clear sheet protectors a huge three ring binder. I have one for sewing and quilting, another for knitting, and one for miscellaneous crafts.
Violet S
10 years agoWhen using stablizer that is in a roll I don’t cut to the size of the hoop. I hoop as usual but don’t cut it. Instead I let it hang on the roll to the back of machine and put a clip on each end to keep it from unrolling. Make sure you have plenty of give so that it doesn’t effect the machine/hoop. This saves on wasting stablizer as I move design to the bottom of hoop, stitch and when done remove from hoop and cut.
beth daniels
10 years agoI usually fold my t=shirts to get the center and 2 1/2″ down from the ribbing. It comes out perfect every time. I use large wonder clips to keep the rest of the shirt out of the way.
Clem
10 years agoI use the hanging shoe rack to store my stabilizer. I hung a rod from the ceiling, then wrapped the shoe hanger around that. I made the rod a bit longer than I needed and hang my bags from the end. Since I have an embroidery machine…(grin) I embroidered the type of stabilizer and stitched it on the shoe rack. Now, when the stabilizer is on sale, I can buy some and store it right where it belongs, and I can see if I am low of any type at a glance.
Brenda
10 years agoMy recent aha moment came after ‘ruining’ a name on a t-shirt by using a hoop too small. A beginner mistake, I left the pressure foot up when checking edges so of course it cleared. The last letter, an N, stitched ok for two of the three legs, but pushed against the edge of the hoop making the last leg a straight line too far in to rehoop and fix. After lamenting the loss for awhile, I realized just before falling asleep that I could use the font’s exclamation point without the dot to stitch over that single line of messed up embroidery and connect to the rest of the letter N. A major save for a beginner and a good thing it’s for a family member.
eileenroche
10 years ago AUTHORThat’s an awesome fix, Brenda!
Cindy Allen
10 years agoI use the noodle loops that are used to make the potholders… (you know the kind I’m talking about right?) to hold my thread in place on the spool. It works perfect and easy on and off.
Danita Munday
10 years agoI’m new to machine embroidery. I kept misplacing things I needed. So I put a small plastic container beside my machine. I keep a bobbin, a couple of dressmakers pins, a fabric marker, my favorite small scissors, a package of machine needles, presser feet, screwdriver, machine oil, spool nets, seam ripper, etc, in it. I clip 4 large plastic hair clips to the edges, which I use for holding the rolled edges of tees or sweatshirts. In a larger basket I keep canned air, spray adhesive, pieces of stabilizer cut to fit my hoops stored in baggies, a ruler, roll of masking tape, large scissors, self-piping stored in a baggie, a box of pins, a package of hand sewing needles, etc. In a larger basket I keep small projects, pieces of fabric, dish towels to embroider for gifts, etc. Since I use my dining room table as my project table, it’s easy to whisk everything away when I need to clean up. I use the masking tape for several things. I tape the loose ends of thread to the spool. I use it to tape instructions to the wall. I use it instead of a lint roller to pick up bits of thread and fabric, especially when I am appliqueing. I tape loose pins and needles to my plastic pins to make them easy to locate. Another tip I learned years ago. Instead of wetting the end of your thread to thread your machine, wet the back side of your machine needle with your finger. The thread will pop right through the hole. I use a small crochet hook to “catch” the bobbin thread and pull it free when it tries to nest under my work so I don’t have to remove my hoop.
Alice
10 years agoI have been doing embroidery over 20 years. One of the best things I have used is the Springs from the pens. I place that spring on the screw of the embroidery hoop. You can set the tension on the hoop and the spring gives you a little stretch and keeps the hoop tight as it needs to be.
Annitta Crowley
10 years agoI use chopsticks to keep the fabric away from small projects like onesies,I also use blue painters tape to wrap around the sleeves of shirts to keep them from interfering with the needle,I also use the clear very thin plastic that can be cut by the yard at my local store to cut to fit and wrap around my spools of thread to keep thread tails from hanging and to keep most of the dust off of my thread on my spool rack, also, I use slap bracelets found in party section to wrap around my stabilizer rolls, they also hang in a shoe rack , I have a pre cut cardboard piece for each size of my hoops so I can use that cardboard piece to cut my stabilizer from the rolls as I need it without wasting stabilizer .
Sandra Ward
10 years agoI started embroidery a little over a year ago and could not get the idea out of my head that there had to be a way to make a hoop insert that would hold the excess out of the way, and I dreamed about one and my better half and I put our heads together and created the aluma hoop we made it out of aluminum with 4 prongs in each corner and it works like a dream!!!
Aurelie higgins
10 years agoBeing short o space in my sewing room, I bought à cheap wooden chair from a resale shop the had a flat seat. I use the seat to hoop and the back to lay my fabric over in the order I am sewing . I also use it to clip my instructions to. When I do tee shirts I lay them on the top rung in oder of the designs in the machine
Sara Redner
10 years agoI clipped the fabric when cutting away excess stabilizer. I thought the project was ruined – until I came up with the idea of embroidering something small over the cut. I’m ashamed to say this has happened more than once!
Theresa Cussimanio
10 years agoWhile working on a split monogram the areas that are hard to get close in to trim I used a lint roller, plus it help to get all the extra tiny threads out of the hoop before the next step of enbroidery.
Sheri
10 years agoAfter breaking a number of needles because my thread was getting hung up off the built in spool holder, I decided I needed a vertical thread stand and since I didn’t want to spend the money (or wait) for one I made one out of a lazy kate (a spinning tool) and a wire coat hanger. It’s not pretty but it works well!
Deborah
10 years agoGreat idea Belinda but I go to FedEx and get my paper man. rebound with that curly notebook wire. They love me there, I wonder why??!!
Debbie D.
JudiC
10 years agoMy most recent “aha” moment was while I was shopping for a laptop sleeve to protect my new laptop while traveling to embroidery software class. I could not find anything like the image I had in my head. Then I thought, aha, I will just make one & I did. I had fabric leftover from the Bernina tote I made several years ago so I whipped up a quick sleeve the night be4 class. Of course after I used it I though of how I could make it even better sew I added an interior pocket.
Kathy Furci
10 years agoI had the same problem with 2 tee shirts I was making for Christmas. The first one came out beautifully. When I ran the second one, It stitched out the writing and then I went to stitch out Christmas Cookies underneath. Well when it was finishing and starting to do the outline stitches of the cookies the bottom of the shirt got caught. It took me an hour to cut all the under stitches that were caught to free it from the needle and slowly pull it out of the machine. Then it came un-hooped. It did not make any tears only a little stretching which could be washed and ironed out. But then I went back to go over the outline stitches it did not line up. The left side was stitching on the design and the right side was stitching off the design leaving a space between the right side of the design and the stitched edging. I finally gave up for a few weeks and then tackled it with another shirt and just watched it carefully. That came out fine, but also taught me not to look away or leave the work.
Bruce
9 years agoI agree, using using the tape that goes around red leaf lettuce keep bunch together.
Bruce, https://www.printavo.com
Giuseppe Winton
9 years agoWho would have thought of this? Nice article.