
Hoop It, Center It, Stitch It with the Center It Kit! The Center It Kit is a quilting placement template set of five nested shapes, including 12” squares, 12” circles, 12” hexagons, 40° diamonds, and 60° diamonds. You get three of each of the flexible and translucent template shapes so you can cut them down to the size needed for your project. Also, there are two different types of target stickers – yellow circles and blue squares for marking your project. You can quickly find and mark the center of blocks, squares, diamonds, circles, rectangles, flying geese, half-square triangles and more!
Let’s look at how to use them. They are so easy to use, and to help you land your embroidery design on any project. First, decide what type of template you are using for your project. Is it a circle applique or maybe a hexagon applique? Use the corresponding shape template. Then decide if you want to cut it down. You can cut the flexible and translucent template with scissors or your rotary cutter and board.

Next, you will want to hoop your project. And then you will decide to use either the yellow round stickers or the blue square stitchers. You ask, what is the difference? Glad you asked. The yellow round stickers are for marking off the machine, and the blue square ones are for marking right under the needle.

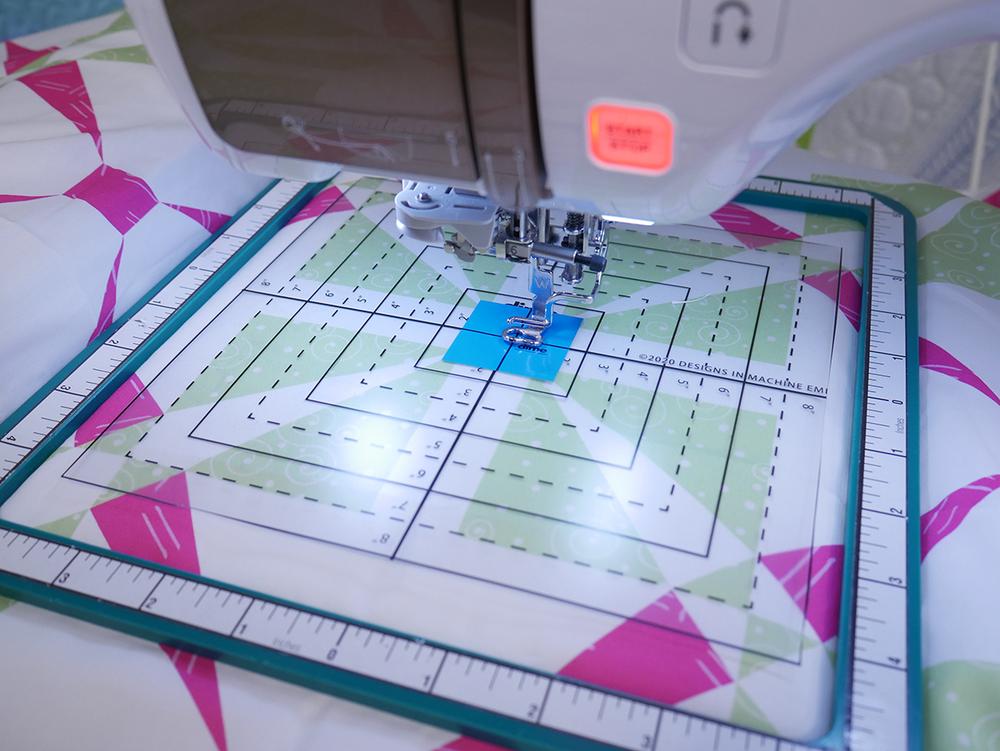
Let’s explain a bit further. You have a pillow with several separate circles or hexagon shaped appliques to embroider. It is quicker to mark all the circles or hexagons first, so, use the yellow round stickers. Just remember to remove the sticker once you have the center lined up with the needle. Then move to the next circle, line it up with the yellow round sticker and remove to stitch, and so on, until the project is complete. Quick and easy!
Now, let’s look at a lone star quilt with many diamonds to individually embroider. It will be quicker to mark as you go. The blue square sticker will be placed on the back of the template and then placed over the shape. Line up the center marking with the needle. Remove the template with blue sticker and stitch quilting design. Repeat with the remaining shapes until the project is complete.
For more inspiration watch Eileen Roche discuss the Center It Kit on Facebook Live from July 29, 2021. Enjoy!
Related posts:


Pingback: Embroidery Placement on Quilt Blocks – Eileen's Machine Embroidery Blog on August 4, 2021
3 COMMENTS
Jackson
3 years agoThanks for Sharing this blog its Really Helpful for us. Best Embroidery Digitizing and Vector Design Company in USA
MayRonda Smirnova
3 years agoYour work is truly impressive! I am not a needlewoman, but I will definitely use some of your article. By the way, if you come to expand your audience, I invite you to my platform for copywritershttps://ulive.fun/funny-memes-es.html We often talk and share tips for improving your home.