
Meet Inspirations Education Consultant Melisa Nisius, this week’s guest blogger. She’s just as passionate about embroidery as you are so I thought it was a good idea for Melisa to share a recent experience with you. You can apply the techniques she outlines to your favorite designs or download the free-for-a-limited-time heart design by clicking here.
Take it away, Melisa!
Recently, while preparing to stitch a hat and searching through my design collection, this stylish heart caught my eye. I knew that I would have to edit the design in software if the finished hat was going to meet my vision. I needed a design with lots of dimension!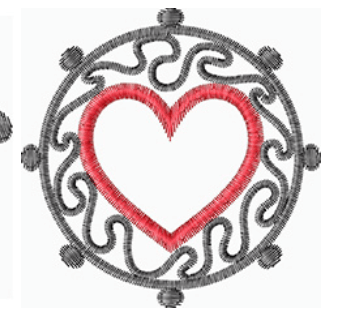
The original design is created with flat satin stitches. Let me show you how easily I changed that by adding puffy foam to just the heart creating a fun, dimensional design. We’ll need to delete a few stitches and recreate the stitches that currently form the satin-stitched heart portion of the design. Ready?
Open the original design in Inspirations’ Perfect Embroidery Pro. Left click File and Save As to save the design with a new name. This will protect your original design, allowing you to go back to the original at any time.
Now let’s have some fun. Left click on color 2 in the sequence viewer. You will notice it is highlighted in blue when selected. Delete it either by using the scissors icon or the delete key on your keyboard.
Now, let’s do that again with color 3. Left click on color 3 to select it then delete it. You should be left with just colors 1 and 4.
Right click on color 1 in the sequence viewer and choose Create Outline. Set the distance to 0.05. Click OK.
Left click to select the newly created artwork in the sequence viewer and then right click on a new color in the Thread Toolbar at the bottom of the screen to change the color.
Here is where the magic happens. Right click on the artwork, color 3 in the sequence view, and select Convert to: Puffy-Stitch. The width of the new stitches is fine but the design itself is too large to fit inside the original frame. We need to adjust the size to fit. Make sure that the newly created puffy stitches are still selected and then in the Properties box choose the Transform icon. Verify the Maintain aspect ratio box is checked then change the width to 1.18 and click the apply button. Finally, right click on color 4 in the sequence viewer, select Order, To Front.
Click File, save. Your design is now ready to stitch.


7 COMMENTS
Shirley Henson
8 years agoOh..so excited to go try this..thanks a bunch!
Carolyn Rollberg
8 years agoThank you.
Karen S
8 years agoThank you am so wanting to have time to play.
Helga
8 years agoThanks but my software is totally different and does not have these type of designs.
Joeann Florczak
7 years agocheck it out – http://www.aliexprtess.com
Bruce
7 years agoThanks this is really exciting.
Bruce, https://www.printavo.com
bcbg dresses
5 years agoHi – in actuality great site you have created. I enjoyed reading this posting. I did want to publish a remark to tell you that the design of this content is very aesthetically delightful. I used to be a graphic designer, now I am a copy editor. I have always enjoyed functioning with information processing systems and am trying to learn code in my free time.
bcbg dresses http://www.bcbgmaxazriae.com